
Garlic Bread Grilled Cheese: 7 Irresistible Steps to Ultimate Comfort
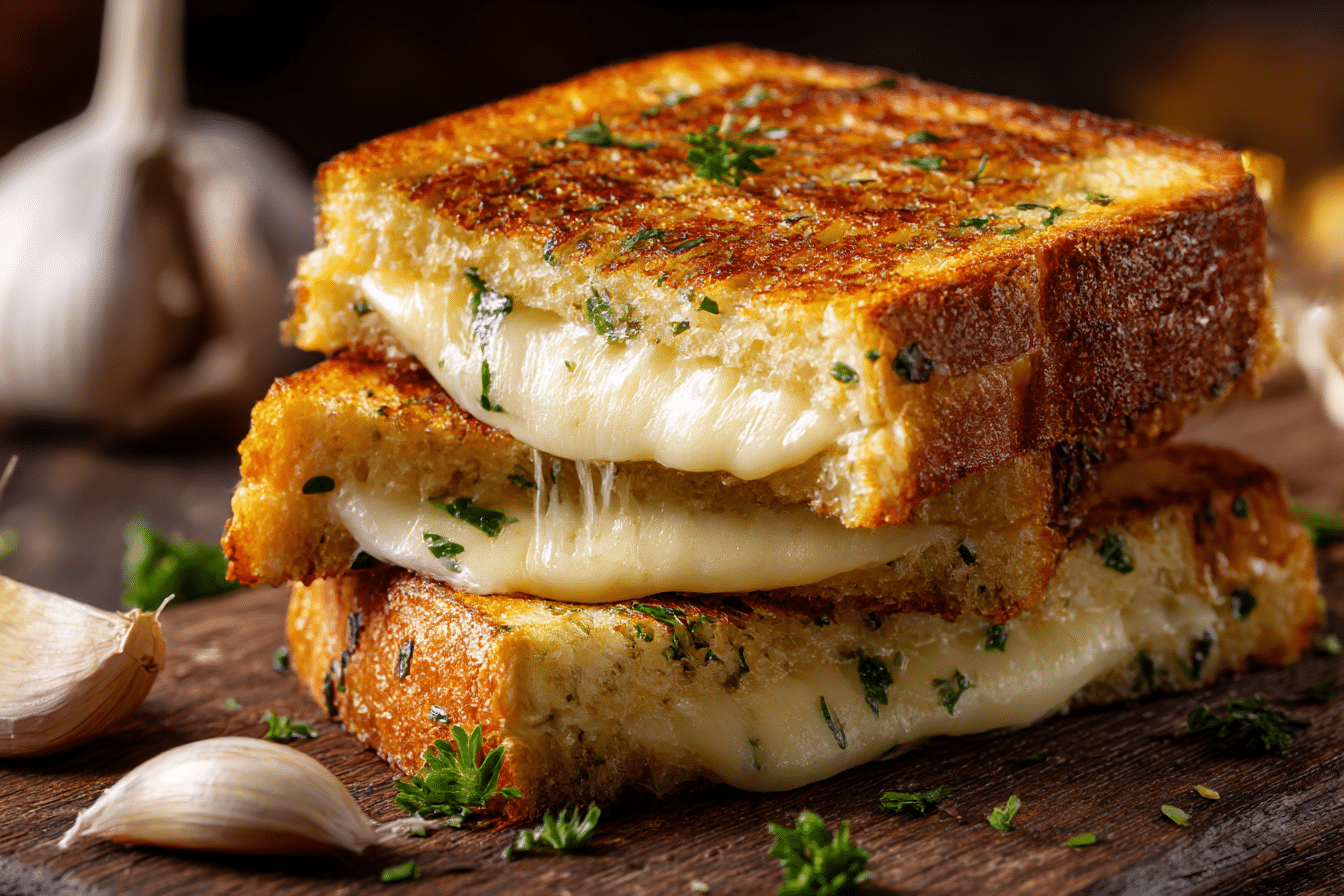
Garlic Bread Grilled Cheese is the perfect twist on a classic comfort food, combining the crispy, buttery texture of garlic bread with the gooey, melty magic of cheese. This recipe is designed for a quick 15-minute lunch that satisfies cravings instantly. Each bite delivers a harmonious blend of savory garlic, rich cheese, and perfectly toasted bread, making it an unforgettable indulgence for anyone who loves a hearty, flavorful sandwich. With its golden, crunchy exterior and molten cheese center, this grilled cheese elevates everyday ingredients into a mouthwatering experience.
The beauty of this Garlic Bread Grilled Cheese lies in its simplicity and the balance of flavors. Whether you’re craving a quick solo lunch or need a dish that impresses friends, this recipe hits every mark. From selecting the perfect bread to choosing the ideal cheese blend, each ingredient plays a vital role in creating this irresistible meal.
Ingredients Overview
The success of Garlic Bread Grilled Cheese starts with bread, cheese, and butter. Fresh, thick slices of rustic or sourdough bread provide a sturdy base that crisps beautifully in the pan. Butter is essential for achieving that golden, flavorful crust, and when combined with fresh minced garlic or garlic powder, it transforms simple toast into garlicky perfection. For a healthier alternative, olive oil can replace butter while still delivering a rich flavor.
Cheese selection is equally important. A combination of mozzarella and sharp cheddar creates the perfect balance of gooey meltiness and tangy depth. Adding provolone or fontina introduces complexity and a slightly nutty undertone. To switch up flavors, gruyère can be used for a sophisticated twist, while vegan cheese works well for dairy-free versions. Layering cheese evenly ensures it melts consistently, providing that luscious, stretchy texture that defines an exceptional grilled cheese.
Additional touches like fresh herbs—parsley or basil—can be mixed into the butter or sprinkled on the cheese for an aromatic lift. Seasoning with a pinch of salt and freshly ground black pepper enhances the natural flavors without overpowering the garlic and cheese. These carefully selected ingredients work together to deliver a sandwich that is crunchy on the outside, gooey in the middle, and bursting with savory flavor.
Ingredients
4 slices rustic sourdough bread
3 tablespoons unsalted butter, softened
2 cloves garlic, minced
1/2 teaspoon garlic powder
1/4 teaspoon salt
1/4 teaspoon freshly ground black pepper
2 slices sharp cheddar cheese
2 slices mozzarella cheese
1 slice provolone cheese
Optional: 1 teaspoon fresh parsley, finely chopped
Step-by-Step Instructions
-
Prepare the Garlic Butter: In a small bowl, mix the softened butter with minced garlic, garlic powder, salt, and black pepper until well combined. This mixture will coat the bread, creating the signature garlicky crunch. Avoid overcooking the garlic, as it can become bitter.
-
Butter the Bread: Spread a generous layer of garlic butter on one side of each bread slice. Ensure full coverage to get even browning during cooking. This step is crucial for a golden, flavorful crust.
-
Assemble the Sandwich: On the unbuttered side of two slices, layer the cheeses evenly—sharp cheddar first for its robust flavor, then mozzarella for meltiness, and provolone for subtle complexity. Sprinkle parsley over the cheese if using. Top with the remaining bread slices, buttered side facing out.
-
Preheat the Pan: Heat a large nonstick skillet or cast-iron pan over medium heat. Allow it to warm thoroughly to ensure the bread crisps evenly without burning.
-
Cook the Sandwich: Place the sandwiches in the pan and cook for 3–4 minutes on the first side until golden brown. Press gently with a spatula to encourage even browning and cheese melting. Flip carefully and cook another 3–4 minutes. Adjust heat if the bread browns too quickly before the cheese melts.
-
Check for Doneness: Peek at the edge of the sandwich to confirm the cheese is fully melted. The exterior should be a deep golden brown with a slight sheen from the butter. If necessary, cover the pan briefly with a lid to trap heat and help melt the cheese.
-
Serve Immediately: Remove from the pan and let rest for 1 minute. Slice diagonally for an appealing presentation. Serve hot to enjoy the ultimate contrast of crispy bread and gooey, cheesy interior.
Common mistakes include using overly thick bread slices that prevent cheese from melting, or cooking on too high heat, which can burn the bread. Applying butter evenly and choosing complementary cheeses ensures the best texture and flavor.
Tips, Variations & Substitutions
For extra crunch, try using a panini press instead of a skillet. If you prefer stronger flavor, add a pinch of smoked paprika or chili flakes to the butter for a subtle kick. Swapping cheddar for gouda or gruyère creates a more nuanced, sophisticated taste profile.
Dairy-free alternatives work perfectly: use vegan butter and plant-based cheese to maintain flavor and texture. Gluten-free bread can replace sourdough for a celiac-friendly version. Adding cooked bacon, caramelized onions, or sautéed mushrooms introduces layers of flavor that complement the garlic and cheese beautifully.
To make this sandwich healthier, consider using whole-grain bread and reducing butter slightly while maintaining a crisp texture. Herbs like thyme or rosemary can replace parsley for a more aromatic variation. Layering cheese thinly prevents greasiness while still delivering that melty, satisfying bite.
Serving Ideas & Occasions
Garlic Bread Grilled Cheese pairs beautifully with tomato soup, roasted vegetables, or a fresh green salad for a complete meal. A crisp pickle on the side adds a refreshing contrast to the richness of the cheese. For beverages, a chilled lemonade or iced tea complements the sandwich perfectly, balancing the savory and buttery flavors.
This sandwich is ideal for a quick weekday lunch, an indulgent weekend brunch, or a cozy dinner when paired with soup. It’s also a crowd-pleasing option for casual gatherings, game nights, or comfort food cravings that hit anytime. Its quick preparation and universal appeal make it a go-to recipe for busy days and leisurely meals alike.
Nutritional & Health Notes
A serving of Garlic Bread Grilled Cheese offers a balance of carbohydrates, fats, and protein. The bread provides energy-rich carbs, while butter and cheese supply fats that contribute to satiety and flavor. Cheese also adds calcium and protein, making the sandwich more filling than plain toast.
Portion control is key to enjoying this indulgent treat without overdoing calories. Using whole-grain bread adds fiber, while choosing lower-fat cheese or moderate butter amounts can reduce overall fat intake. Fresh herbs and optional vegetables contribute vitamins and antioxidants. Though rich and decadent, this sandwich can fit into a balanced diet when enjoyed in moderation.
FAQs
Can I use different types of bread?
Yes, you can experiment with various breads like ciabatta, multigrain, or brioche. Denser breads like ciabatta offer a hearty chew, while softer breads like brioche provide a sweeter, tender contrast. Ensure slices are thick enough to hold the cheese but not so thick that it prevents even melting.
Can I make this ahead of time?
You can prepare the garlic butter and slice the cheese ahead of time, but it’s best to assemble and cook the sandwich right before eating. Pre-made sandwiches can be refrigerated for a few hours, but the bread may become soggy, and the cheese may not melt evenly.
How do I prevent the bread from burning?
Cook over medium heat and monitor closely. Press gently with a spatula and flip when the first side is golden brown. If the exterior browns too fast, lower the heat and cover the pan briefly to ensure the cheese melts without burning the bread.
Can I add other fillings?
Absolutely. Ingredients like cooked bacon, caramelized onions, sautéed mushrooms, or roasted red peppers enhance flavor. Just avoid overloading, which may prevent proper melting and even cooking.
Can I freeze this sandwich?
Freezing is possible, but best for pre-assembled, unbuttered sandwiches. Wrap tightly and freeze, then cook directly from frozen, adjusting time slightly. Fully cooked sandwiches may become soggy when reheated.
How do I make it dairy-free?
Replace butter with plant-based alternatives and choose vegan cheese. Olive oil can also substitute for butter. Ensure your vegan cheese melts well for a satisfying, gooey texture.
How do I get extra crispy edges?
Use a cast-iron skillet or nonstick pan with a generous layer of butter. Press gently while cooking and flip carefully. Cooking slowly over medium heat ensures a crunchy exterior while the cheese melts perfectly.
PrintGarlic Bread Grilled Cheese – Ultimate 15-Min Lunch
5 Stars 4 Stars 3 Stars 2 Stars 1 Star
No reviews
A quick and indulgent grilled cheese with buttery garlic bread and melty cheese.
- Author: Maya Lawson
- Prep Time: 5 minutes
- Cook Time: 10 minutes
- Total Time: 15 minutes
- Yield: 2 sandwiches 1x
Ingredients
4 slices rustic sourdough bread, 3 tablespoons unsalted butter, 2 cloves garlic, minced, 1/2 teaspoon garlic powder, 1/4 teaspoon salt, 1/4 teaspoon black pepper, 2 slices sharp cheddar cheese, 2 slices mozzarella cheese, 1 slice provolone cheese, 1 teaspoon fresh parsley (optional)
Instructions
1. Mix butter, minced garlic, garlic powder, salt, and pepper. 2. Spread butter mixture on one side of each bread slice. 3. Layer cheeses on unbuttered sides, sprinkle parsley if using, and top with remaining bread. 4. Heat skillet over medium heat. 5. Cook sandwiches 3–4 minutes per side until golden brown and cheese melts. 6. Check edges for fully melted cheese, cover briefly if needed. 7. Slice diagonally and serve hot.
Notes
Use different bread types, add bacon or mushrooms, or try vegan alternatives.